클러스터 이전 작업 로그
AUGUST 23, 2022
이번에 인프라 이전 작업이 잦아질 듯 싶다.
작업 기록을 정리하고 스크립트를 만들 수 있는 곳을 찾아봐야겠다.
✔️ 깃헙 레포 미러링
-
공동체 깃헙에서 kep 깃헙으로 미러링 필요시
$ git clone --mirror {기존 레포 주소}
$ cd {기존 레포명}.git
$ git remote set-url --push origin {신규 레포 주소}
$ git push --mirror
✔️ 클러스터 생성
-
IKE 클러스터 생성시에 커버로스 인증을 위해 아래 스크립트 수행이 필요하다.
curl -s https://kenopy.kakaoicloud.in/kenopy/IKE/kenopy-ike.sh | bash
✔️ 클러스터 세팅
1. ingress controller 설치
1.1 도커파일 세팅
- 필요시 nginx-ingress docker hub 사이트에서 도커 이미지를 받는다.
- official 사이트에서 도커 이미지 받아서 사내 registry에 올릴 경우, 아래 명령어를 이용한다.
$ docker pull {official docker image}

# 이미지명 변경
$ docker image tag {이미지ID} {변경할 이름}:{태그}
또는
$ docker image tag {변경전 이름}:{태그} {변경할 이름}:{태그}

$ docker push {변경된 이름}:{태그}- 터미널에서 docker login 명령어
echo {패스워드/CREDENTIAL_SECRET} | docker login {registry 주소} -u {아이디/CREDENTIAL_ID} --password-stdin1.2. 설치
-
k8s 매니페스트로 설치
-
헬름으로 설치
-
헬름레포 추가
$ helm repo add ingress-nginx https://kubernetes.github.io/ingress-nginx "ingress-nginx" has been added to your repositories $ helm repo update Hang tight while we grab the latest from your chart repositories... ...Successfully got an update from the "ingress-nginx" chart repository Update Complete. ⎈Happy Helming!⎈ -
배포
$ helm install ingress-nginx ingress-nginx/ingress-nginx \
    --version {버전} \
    --set controller.hostNetwork=true \
    --namespace ingress-nginx --create-namespace
-
1.3. 배포 확인
-
파드 정상 작동 확인
$ kubectl get pods -n ingress-nginx \ -l app.kubernetes.io/name=ingress-nginx --watch -
설치 완료 후 LoadBalancer EXTERNAL-IP(엔드포인트) 확인
$ kubectl get service -n ingress-nginx
NAME                                 TYPE           CLUSTER-IP      EXTERNAL-IP       PORT(S)                      AGE
ingress-nginx-controller             LoadBalancer   10.101.148.33   xxx.xxx.xxx.xxx   80:31027/TCP,443:31138/TCP   36m
ingress-nginx-controller-admission   ClusterIP      10.104.56.176   <none>            443/TCP                      36m
2. secret 생성
✔️ docker-registry
-
만약, 배포시 사용하는 registry가 public이 아닐 경우, docker 인증을 위한 secret 등록이 필요하다.
$ kubectl create secret docker-registry {docker-registry secret명} \
--docker-server={registry 주소} \
--docker-username={아이디/CREDENTIAL_ID} \
--docker-password={패스워드/CREDENTIAL_SECRET}
-n {namespace}
✔️ tls 인증서
-
https 프로토콜 사용을 위해 tls 인증서를 등록한다.
kubectl create secret tls {tls secret명} \ --key {private key} --cert {cert} -n {namespace} -
만약 private key 가 암호화 되어있을 경우 openssl 을 이용하여 복호화하여 tls secret으로 등록한다.
$ openssl rsa -in key.pem -out decrypted_key.pem
3. proxy daemonset 설치
- 사내에서는 외부통신과 내부통신에 대한 proxy/non-proxy 설정이 필요하다.
-
아래 파일을 참고해서 http-proxy 데몬셋을 적용한다.
kind: DaemonSet apiVersion: apps/v1 metadata: name: set-http-proxy labels: app: set-http-proxy spec: selector: matchLabels: app: set-http-proxy template: metadata: labels: app: set-http-proxy spec: hostPID: true containers: - name: startup-script image: {아래 명령어를 실행할 수 있는 linux 이미지} securityContext: privileged: true env: - name: PROXY value: {proxy 주소} - name: NO_PROXY value: {non-proxy 주소들} command: - nsenter # namespace enter의 약어. 격리된 namespace에 진입하는 명령어 - --mount=/proc/1/ns/mnt - -- - sh - -xc - | # Create environment file cloud-init-per always set_proxy_to_environment cat << EOF >> /etc/environment http_proxy=$PROXY https_proxy=$PROXY HTTP_PROXY=$PROXY HTTPS_PROXY=$PROXY no_proxy=$NO_PROXY NO_PROXY=$NO_PROXY EOF # Configure containerd with proxy cloud-init-per always use_environment_to_containerd tee <<EOF /etc/systemd/system/containerd.service.d/proxy.conf >/dev/null [Service] EnvironmentFile=/etc/environment EOF # Reload the daemon and restart containerd cloud-init-per always reload_daemon_for_containerd systemctl daemon-reload cloud-init-per always restart_containerd systemctl restart containerd trap : TERM INT sleep infinity & wait -
적용
$ kubectl apply -f http-proxy-daemonset.yaml
✔️ EFK 세팅
1. ES 설치는 인프라팀에 요청
2. Kibana 설치
-
yaml 파일
apiVersion: apps/v1
kind: Deployment
metadata:
  name: kibana
  namespace: kibana
  labels:
    app: kibana
spec:
  replicas: 1
  selector:
    matchLabels:
      app: kibana
  template:
    metadata:
      labels:
        app: kibana
    spec:
      containers:
      - name: kibana
        image: {kibana 이미지 주소}
        ports:
        - containerPort: 5601
        env:
            - name: ELASTICSEARCH_HOSTS
              value: {ES 주소}
---
apiVersion: v1
kind: Service
metadata:
  name: kibana
  namespace: kibana
  labels:
    app: kibana
spec:
  ports:
    - name: http
      port: 80
      protocol: TCP
      targetPort: 5601
  selector:
    app: kibana
---
apiVersion: networking.k8s.io/v1
kind: Ingress
metadata:
  name: kibana-ingress
  namespace: kibana
  annotations:
    nginx.ingress.kubernetes.io/rewrite-target: /
    kubernetes.io/ingress.class: nginx
spec:
  rules:
  - host: {Kibana 호스트주소}
    http:
      paths:
      - pathType: Prefix
        path: "/"
        backend:
          service:
            name: kibana
            port:
              number: 80
3. Log Aggregator 서버 설치
- fluentd 로 로그 수집서버를 세팅한다.
3.1. vm 생성 후 apt 업데이트
$ sudo apt -y update3.2. td-agent 설치
$ curl -fsSL https://toolbelt.treasuredata.com/sh/install-ubuntu-bionic-td-agent4.sh | sh

# 설치 후 fluentd 버전 확인
$ /opt/td-agent/bin/fluentd --version-
만약 아래와 같은 오류가 발생한다면, /tmp 디렉토리의 권한을 777로 변경해준 후, 작업완료되면 775로 롤백한다
# 에러:
# Couldn't create temporary file /tmp/apt.conf.** for passing config to apt-key
##
# 조치:
$ sudo chmod 777 /tmp
# 작업 완료 후 롤백
$ sudo chmod 775 /tmp
3.3. /etc/td-agent/td-agent.conf 파일 수정
-
기본세팅
<system> @log_level info workers 8 # 필요에 따라 워커수 조절 </system> <source> @type monitor_agent port 24420 </source> <source> @id in_forward @type forward port 24224 <parse> @type json type_key @timestamp time_format %Y-%m-%dT%H:%M:%S.%N%z localtime </parse> </source> <match tag_prefix.**> @type copy <store> @id copy_stdout @type stdout </store> <store> @type elasticsearch @id out_es include_tag_key true host {es 주소} port 9200 scheme http reload_connections "#{ENV['ELASTICSEARCH_RELOAD_CONNECTIONS'] || 'true'}" logstash_prefix ${tag} logstash_format true logstash_dateformat %Y.%m.%d type_name fluentd id_key _uuid <buffer tag> @type file path /var/log/td-agent/buffer/es/ flush_thread_count 1 chunk_limit_size 16mb queue_limit_length 2560 flush_interval 5s flush_at_shutdown true retry_max_times 10 retry_forever false </buffer> </store> </match> - 해당 VM 인바운드 정책에 forward의 포트 24224 허용 필요!!!
-
3.4에서 서비스 실행 후 acl 확인
$ telnet {vm 주소 또는 로그어그리게이터서버 도메인주소} 24224
3.4. td-agent 실행
-
서비스 실행
$ sudo systemctl start td-agent.service -
로그 확인
$ tail -f /var/log/td-agent/td-agent.log
4. fluentd 데몬셋 세팅
4.1. RBAC 설정
apiVersion: v1
kind: ServiceAccount
metadata:
  name: fluentd-service-account
  namespace: fluentd

---
apiVersion: rbac.authorization.k8s.io/v1
kind: ClusterRole
metadata:
  name: fluentd-cluster-role
  namespace: fluentd
rules:
  - apiGroups:
      - ""
    resources:
      - pods
      - namespaces
    verbs:
      - get
      - list
      - watch
---
kind: ClusterRoleBinding
apiVersion: rbac.authorization.k8s.io/v1
metadata:
  name: fluentd-cluster-role-binding
  namespace: fluentd
roleRef:
  kind: ClusterRole
  name: fluentd-cluster-role
  apiGroup: rbac.authorization.k8s.io
subjects:
  - kind: ServiceAccount
    name: fluentd-service-account
    namespace : fluentd
4.2. input, filter, output 에 대한 기본 설정 (configmap.yaml)
apiVersion: v1
kind: ConfigMap
metadata:
  name: fluentd-configmap
  namespace: fluentd
  labels:
    k8s-app: fluentd-logging
    kubernetes.io/cluster-service: "true"
    version: v1
data:
  fluent.conf: |
    <system>
      workers 1
      @log_level info
    </system>
    @include input-kubernetes.conf
    @include filter-kubernetes.conf

    <match **>
      @type copy
      <store>
        @type                         forward
        @id                           out_ai_forward
        expire_dns_cache              60s
        <server>
          host                        {로그어그리게이터 서버주소}
        </server>
        <buffer>
          @type                       memory
          flush_interval              5s
          flush_at_shutdown           true
        </buffer>
      </store>
    </match>

  input-kubernetes.conf: |
    <match fluent.**>
      @type                           null
    </match>
    <source>
      @type                           tail
      @id                             in_tail_container_logs
      path                            /var/log/containers/*.log
      pos_file                        /var/log/fluentd-containers.log.pos
      exclude_path                    ["/var/log/containers/fluentd*.log"]
      tag                             kubernetes.*
      read_from_head                  "#{ENV['FLUENTD_INPUT_READ_FROM_HEAD'] || 'false'}"
      limit_recently_modified         "#{ENV['LIMIT_RECENTLY_MODIFIED'] || '120m'}"
      rotate_wait                     0
      enable_stat_watcher             false
      <parse>
        @type                         regexp
        expression                    /^(?<time>[^ ]+) (?<stream>stdout|stderr) (?<flags>[^ ]+) (?<message>.*)$/
      </parse>
    </source>

  filter-kubernetes.conf: |
    <filter kubernetes.**>
      @type                           kubernetes_metadata
      @id                             filter_kube_metadata
    </filter>


    <filter kubernetes.**>
      @type                           record_modifier
      tag                             ${record.dig("kubernetes", "container_name").gsub('-', '.')}
      <record>
        @timestamp                    ${(Time.at(time) + (60*60*9)).strftime('%Y-%m-%dT%H:%M:%S.%L+09:00')}
        cluster_name                  "cluster name"
        hostname                      "#{ENV['K8S_NODE_NAME']}"
        container_image               ${record.dig("kubernetes", "container_image")}
        pod_name                      ${record.dig("kubernetes", "pod_name")}
      </record>
    </filter>

    <filter kubernetes.**>
      @type                           parser
      key_name                        message
      reserve_data                    true
      remove_key_name_field           true
      <parse>
        @type                         json
      </parse>
    </filter>

    <filter kubernetes.**>
      @type                           record_transformer
      remove_keys                     $.kubernetes
    </filter>
4.3. 데몬셋 설정
- fluentd-daemonset 도커 이미지 official github - https://github.com/fluent/fluentd-kubernetes-daemonset
apiVersion: apps/v1
kind: DaemonSet
metadata:
  name: fluentd-daemonset
  namespace: fluentd
  labels:
    k8s-app: fluentd-logging
    version: v1
    kubernetes.io/cluster-service: "true"
spec:
  selector:
    matchLabels:
      k8s-app: fluentd-logging
      kubernetes.io/cluster-service: "true"
      version: v1
  updateStrategy:
    type: RollingUpdate
  template:
    metadata:
      labels:
        k8s-app: fluentd-logging
        version: v1
        kubernetes.io/cluster-service: "true"
    spec:
      hostNetwork: true
      dnsPolicy: ClusterFirstWithHostNet
      serviceAccount: fluentd-service-account
      serviceAccountName: fluentd-service-account
      tolerations:
        - key: node-role.kubernetes.io/master
          effect: NoExecute
      containers:
        - name: fluentd
          image: {fluentd 이미지}
          imagePullPolicy: IfNotPresent
          env:
            - name: K8S_NODE_NAME
              valueFrom:
                fieldRef:
                  fieldPath: spec.nodeName
          resources:
            limits:
              memory: 400Mi
            requests:
              cpu: 100m
              memory: 200Mi
          volumeMounts:
            - name: varlog
              mountPath: /var/log
            - name: varlibdockercontainers
              mountPath: /var/lib/docker/containers
              readOnly: true
            - name: resolvconf
              mountPath: /etc/resolv.conf
            - name: tz-config
              mountPath: /etc/localtime
              readOnly: true
            - name: fluentd-config
              mountPath: /fluentd/etc/
      terminationGracePeriodSeconds: 30
      volumes:
        - name: varlog
          hostPath:
            path: /var/log
        - name: varlibdockercontainers
          hostPath:
            path: /var/lib/docker/containers
        - name: resolvconf
          hostPath:
            path: /etc/resolv.conf
        - name: tz-config
          hostPath:
            path: /etc/localtime
        - name: fluentd-config
          configMap:
name: fluentd-configmap- 위 순서대로 클러스터에 apply 한다.
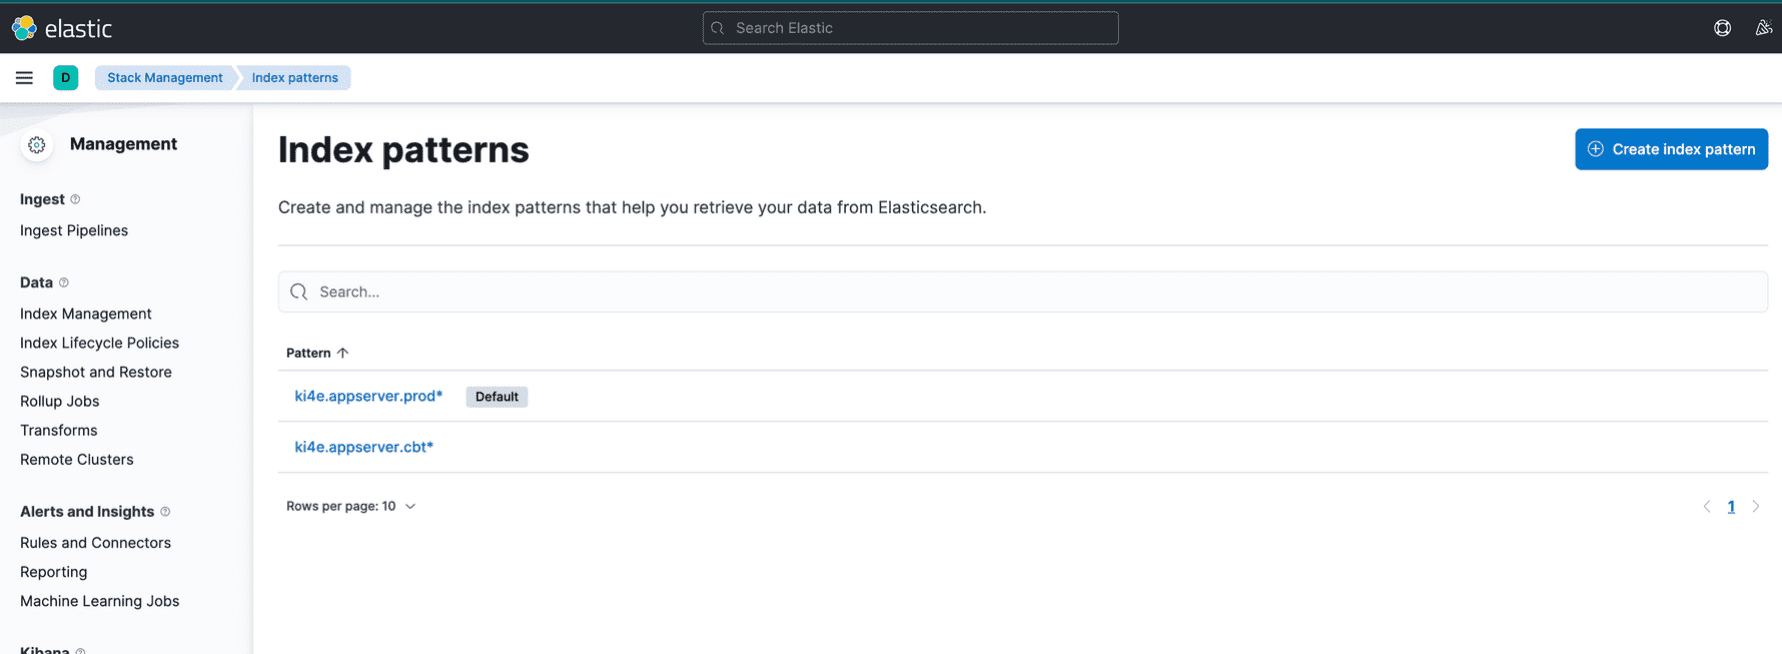
5. Kibana에서 index 패턴 추가
- 메뉴 > stack management > index patterns 에서 인덱스 생성